skip to main |
skip to sidebar
 Hello everyone! Here is a virtual big hug for all of you lovely folks for coming back here after my longest blog break ever. I apologize for having being away for this long without giving you a heads-up (again!). I have been tied up with some project for the past few months, which is coming to an end now, so I will be back to my normal crafting and blogging schedule very very soon! I can hardly wait! You have no idea how much stuff I have on my to-blog-about list now. I have so many things I want to talk about and share you with, but for today,I have a super simple scrappy hour glass block tutorial for you.
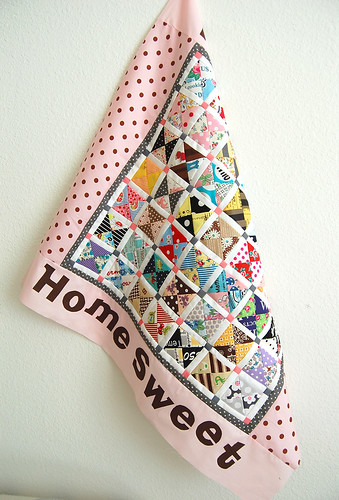
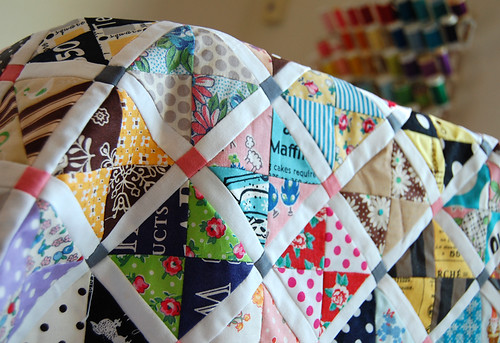
Do you remember this quilt top? I started working on this about a year and a half years ago with no plan ahead. I just had so much fun playing with my precious scrappy fabrics and hoped they would inspire me to make something with them.
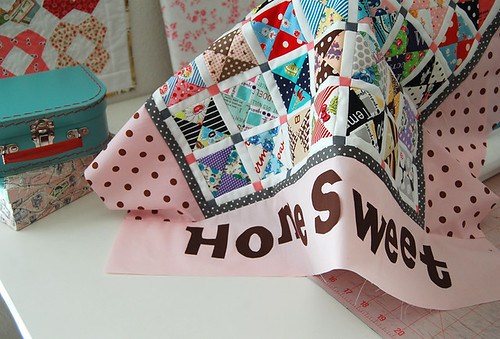
I remember this project being very pleasing partly because it didn't turn out to be too busy (at least I think so, hehe!) I love scrappy look so much, but when my scrappy project is big in scale, I tend to worry that it would be too busy for my eyes. I added solid sashing between each block, which I think helpedto offset the craziness. And the little square blocks are added fun ;)
Just like what happens to many projects of mine, it was side tracked by other projects and months passed by so I haven't made a progress since then!When the sweet, talented friend Rachel of Stitched in Color contacted me last year if I could participate in Scrap Attack she is hosting,I immediately thought of this idea of revisiting this quilt top for it. I got it out of a zip lock yesterday and it had its first fresh air in Japan.Thanks to Rachel for giving me this opportunity! Now I actually want to finish this quilt.I always appreciate this kind opportunity that gives me a littlepush to go back to my old projects and actually finish them.
This tute might be a bit too simple, but I hope this will inspire some of you to turn your scraps into teeny hour glasses and hopefully do something with them! Each block finishes at a 2 1/4" square. Yup, it's teeny tiny, so these have potentials to be used for some small patchwork projects too!

Two squares, each measuring 3 3/4" x 3 3/4".

Cut from one corner to the other corner.
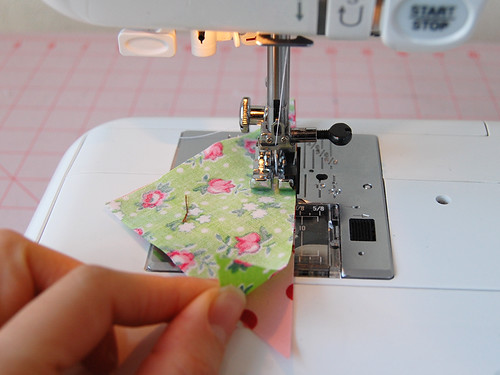
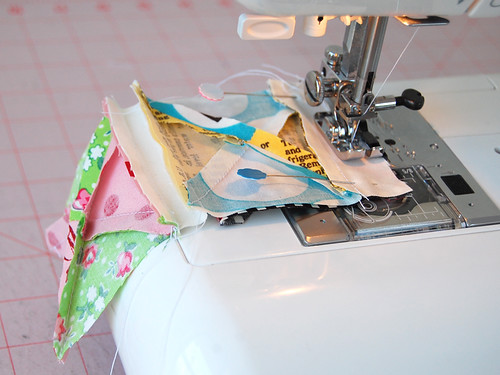
Take one of each triangle and sew along the long edges like this.(1/4" seam allowance as usual ;) )
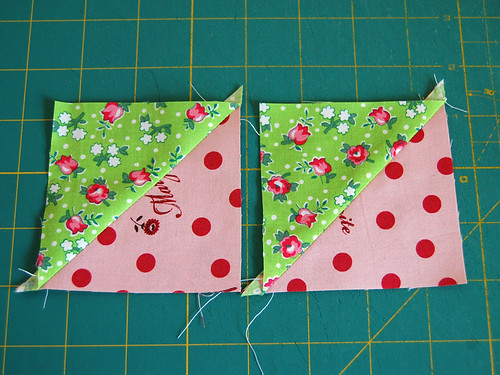
Press seams to one side (same side for both.)
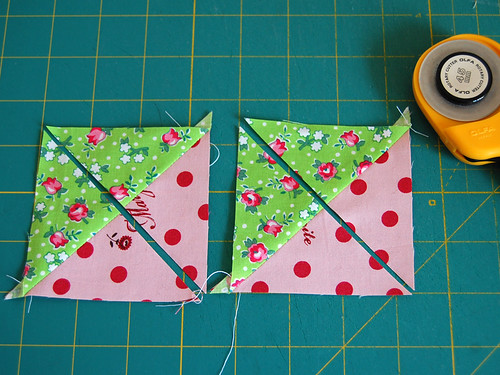
Chop!
Trade between the two!
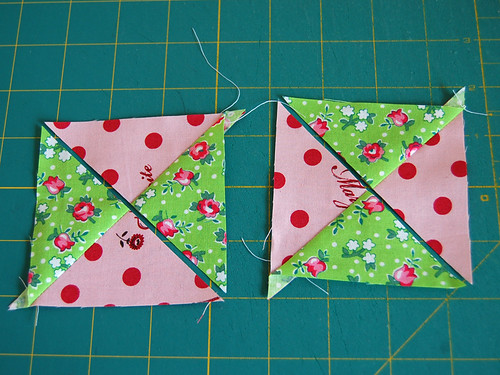
Now to sew this bottom edge.

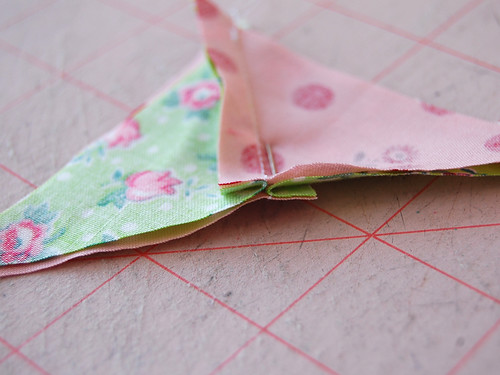
Press seam open.

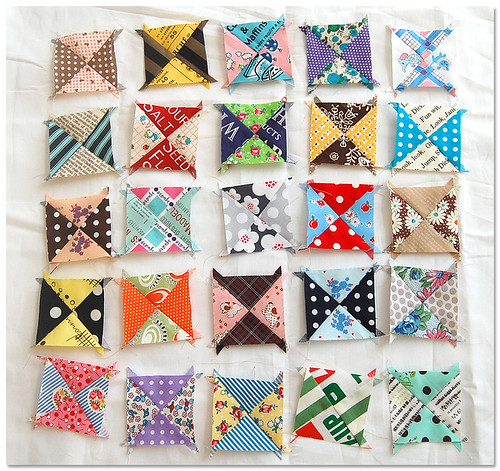
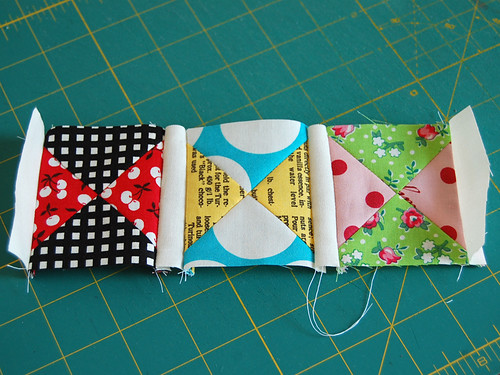
Now you have two hour glass blocks, each measuring a little larger than a 2 3/4" square.
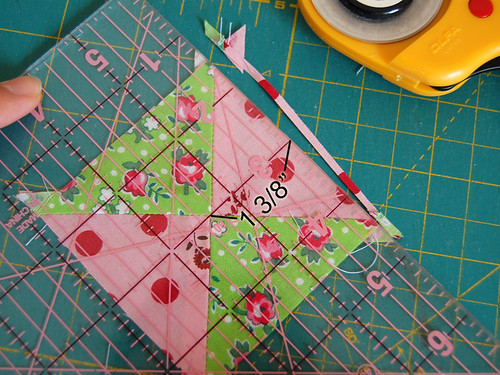
We want to trim down each square to be a 2 3/4" square. (1 3/8" from one edge is the center point.) Cut off the excess.
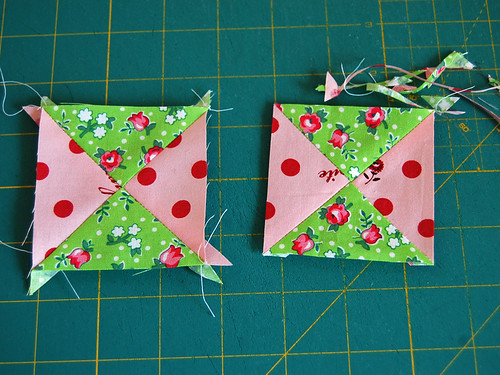
The one on the right hand side is done.Repeat the same process for the remaining block too.
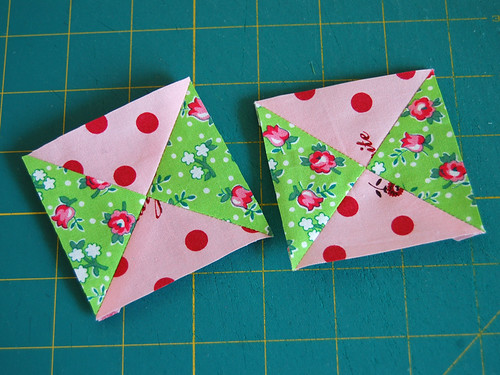
Now they are clean and pretty ;)

It's quite addictive!
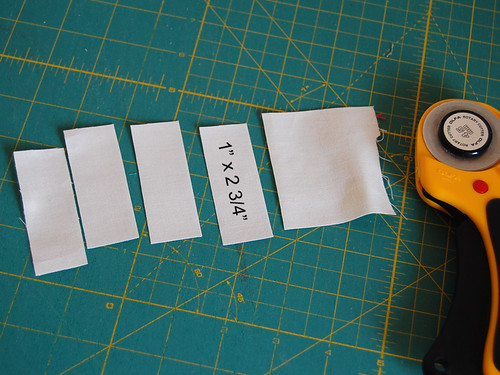
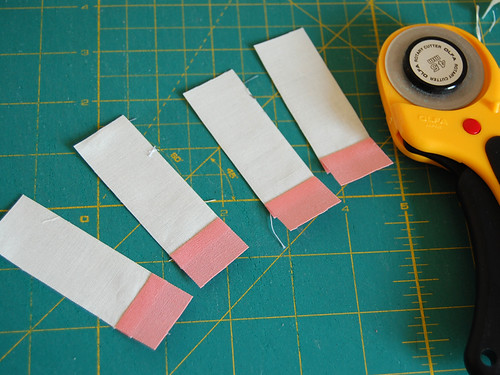
We'll need some 1" x 2 3/4" strips.
to join blocks to make a row.
Here I have the white strips sewn at the short edges of the panel,but you can choose to do that part later. Completely up to you.
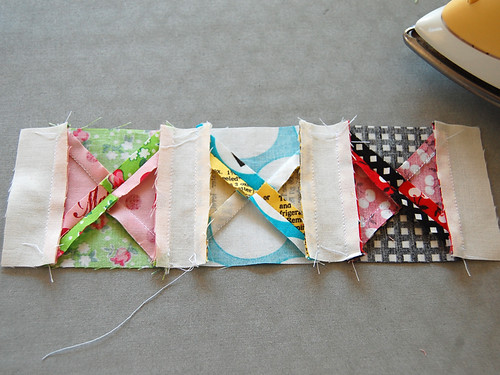
I like to press seams this way.
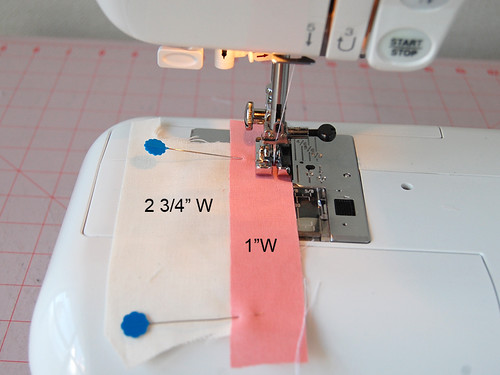
To make a sashing that comes between rows, we'll needsome strips with a little colored block attached.Here I am sewing together a 1" wide pink strip anda 2 3/4" wide white rectangle. (Don't worry about length of each fabric.)
After pressing seam to the colored fabric side, chop it offto create some 1" wide strips like this.
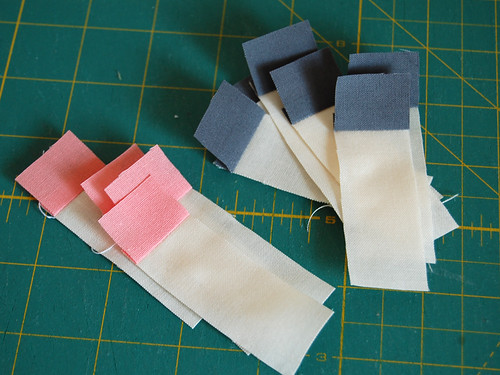
And repeat the same process with grey fabric.
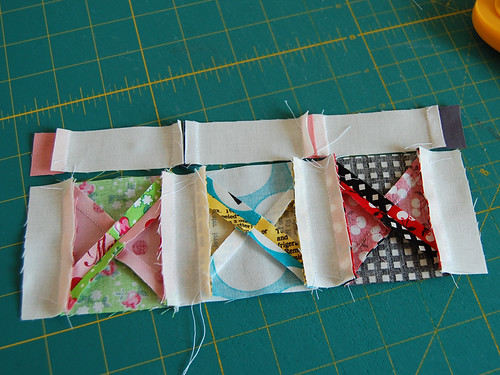
Here is to show you how I pressed seams on the sashing. (I made the sashing by sewing three strips and a 1" square at the short end.)

Sew along the edge.

Tada! Here is the beginning of the scrappy quilt.

If you would like to make a similar mini quilt, here is a measurement of my quilt. I have 49 hour glassblocks with sashing between and around them.I added a 1/2" wide border and then finished with a 4 1/4" wide border.This quilt measures a 32 3/4" square - a nice size for a baby quilt?
I would be thrilled if this tutorial could inspire you toplay with your scraps! If you are feeling scrappy, don't forget to stop byRachel's blog and Scrap Quilt Attack Quilt Along Flickr pool tocheck out everyone's scrappy projects - so inspiring!!
I'll be back next month and have tons of stuff to share with you!Hope you are all having a nice week ;)